

Table of Contents
- What You'll Need: Essential Gear for Salmon Trolling Rigs
- How to Rig Salmon for Trolling: Step-by-Step Setup
- Downrigger Setup for Salmon: Depth Control and Deployment
- Best Salmon Trolling Lures: Selecting Spoons, Plugs, and Soft Plastics
- Flasher and Hoochie Setup for Salmon: Traditional and Modern Approaches
- Salmon Trolling Speed: Finding the Sweet Spot for Your Target Species
- Common Mistakes to Avoid When Rigging Salmon
- Conclusion
How to Rig Salmon for Trolling: Complete Setup Guide
Last Updated: July 28, 2026
When you're preparing to troll for salmon, your rig setup determines whether you'll connect with fish or spend the day watching empty lines. Learning how to rig salmon for trolling requires attention to detail and understanding what each component does. At Elliott's Tackle & Rigging, we've helped thousands of anglers dial in their setups for everything from coho to chinook. Below, we'll walk you through assembling a salmon trolling rig that works, from selecting your main line to configuring your lure or bait setup.
The difference between an effective rig and a mediocre one comes down to how each element interacts with the others. Your main line carries the load. Your leader provides abrasion resistance and invisibility. Your terminal tackle delivers the attraction. When these components work together, you'll catch fish consistently.
What You'll Need: Essential Gear for Salmon Trolling Rigs
Gather monofilament main line in the 12-20 pound range, depending on whether you're targeting smaller coho or larger chinook. A quality leader material, typically 20-30 pound monofilament or fluorocarbon, gives you abrasion resistance without sacrificing invisibility. You'll also need terminal tackle: spoons, plugs, or soft plastics in colors that match local bait fish like herring, anchovy, and sardine. Add a downrigger to control depth, a flasher or hoochie rig to create attraction, and basic rigging tools including scissors, needle-nose pliers, and a line stripper.
Elliott's Tackle & Rigging carries monofilament options designed specifically for Pacific Northwest trolling. The [Sufix Superior Neon Fire Monofilament](https://easi1y-0z.myshopify.com/products/sufix-superior-neon-fire-monofilament) provides exceptional tensile strength and controlled stretch for fast recovery when you hook a fish. For deeper water or overcast conditions, the Sufix Superior Smoke Blue Monofilament delivers durability at a lower price point. For maximum invisibility, the Sufix Superior Clear Monofilament performs identically but disappears in the water column.
Invest in a modern downrigger system. Scotty downriggers remain industry standards for reliability and ease of use. Cannon systems offer heavier-duty construction for commercial or charter operations. Cisco fishing systems provide electronics integration for automating depth control based on water temperature or sonar readings. These are the foundation of consistent depth presentation, which is everything in salmon trolling.
How to Rig Salmon for Trolling: Step-by-Step Setup
Step 1: Select and Spool Your Main Line
Start with a reel spooled with quality monofilament. For coho in clear water, 12-15 pound test works well. For chinook or rocky structure, step up to 15-20 pound test. Wind the line onto your reel with consistent tension, too loose and it'll slip under load, too tight and you'll damage the line.
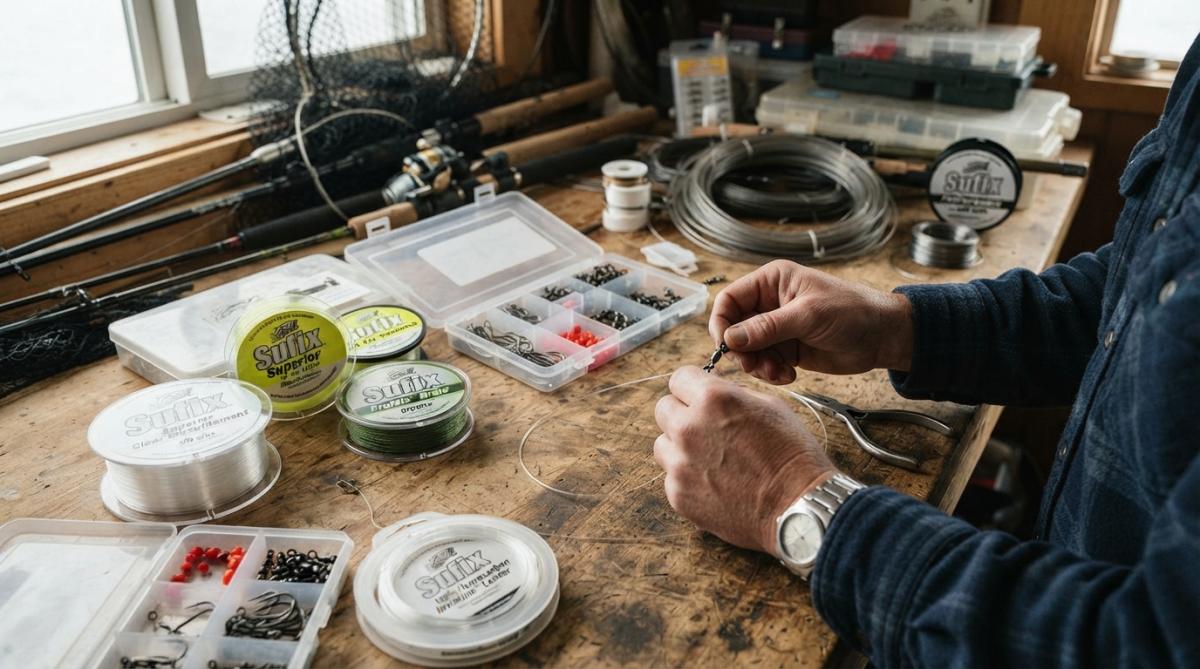
Before attaching your leader, check your main line for weak spots by running it through your fingers or using a line stripper. Any compromise in the line's integrity will fail when you hook a large fish. Cut out damaged sections and retie.
Step 2: Attach Your Leader and Terminal Tackle
Tie a surgeon's knot or improved clinch knot to attach your leader material to the main line. The leader should be 18-36 inches long, depending on water clarity. In clear water or high fishing pressure, use longer leaders. In stained water or when salmon are actively feeding, shorter leaders work fine.
At the end of your leader, tie your terminal tackle using an improved clinch knot or palomar knot. These knots retain 90-95% of the line's rated strength when tied correctly. Wrap the line around the hook eye at least five times, cinch it tight, and trim the tag end close to the knot.
Step 3: Configure Your Lure or Bait Setup
Some anglers prefer a simple setup: main line to leader to spoon. Others add a flasher ahead of a hoochie to increase visibility and create a scent trail. Both approaches work in different conditions.
For a basic setup, tie your spoon directly to the leader. Spoons work through flash and vibration, mimicking fleeing bait fish. Plugs dive to specific depths and create realistic swimming action. Soft plastics allow you to fish scent attractants directly against the lure body, improving hookup rates in low-visibility water.
For a flasher and hoochie setup, tie the flasher to your leader first (24-36 inches from the main line connection). Then tie a shorter piece of monofilament (8-12 inches) to the flasher's trailing eye and attach your hoochie or small soft plastic. The flasher creates flash and vibration while the hoochie provides scent and a natural profile.
Downrigger Setup for Salmon: Depth Control and Deployment
A downrigger is a mechanical system that holds your line at a precise depth while you troll. The weight, typically 8-12 pounds, sinks to your target depth, and your fishing line clips to a release mechanism. When a salmon strikes, the line pulls free from the release, and you fight the fish on your main line without the weight.
Set your target depth based on water temperature and time of year. In spring, salmon often feed near the surface or in the top 20 feet. By mid-summer, they've moved deeper to find cooler water, often 40-80 feet down. Fall fishing can be anywhere from 20-60 feet depending on the specific system.
Lower your downrigger weight to your target depth, then clip your main line into the release mechanism. The release should be tight enough to hold your line securely but sensitive enough to trip when a fish strikes. Adjust sensitivity by tightening or loosening the release knob, this is a critical tuning point.
Keep your rod tip at a slight angle (about 45 degrees from horizontal) while trolling. This positioning allows the rod to absorb the shock of a strike and gives you room to set the hook hard when the line releases from the downrigger.
Best Salmon Trolling Lures: Selecting Spoons, Plugs, and Soft Plastics
Spoons dominate salmon trolling for good reason. They're effective, durable, and work across many conditions. A 3-4 inch spoon in chrome, gold, or natural finishes mimics herring and anchovy. Larger spoons (4-5 inches) work better for chinook, while smaller spoons (2.5-3.5 inches) excel for coho.
Plugs provide a more realistic swimming action and can be tuned to dive to specific depths. A shallow-running plug might stay in the top 15 feet, while a deep diver reaches 40+ feet. The advantage is their natural appearance. The disadvantage is they're more expensive and more prone to damage on rocks or structure.
Soft plastics have gained popularity because they allow you to fish scent attractants directly against the lure. A 4-6 inch soft plastic rigged on a jig head or shank hook can be fished alone or behind a flasher. You're combining visual attraction with olfactory attraction.
Color selection matters through contrast and light absorption. In clear water, natural colors like silver, gold, and pearl work best because they reflect available light. In stained or murky water, darker colors or high-contrast patterns like chartreuse and black stand out against the background.
Flasher and Hoochie Setup for Salmon: Traditional and Modern Approaches
A flasher is a blade or dodger that spins or wobbles ahead of your main lure, creating flash and vibration that attracts salmon from distance. The hoochie is a small soft plastic tube (typically 2-3 inches) that rides behind the flasher and provides a natural profile and scent dispersal.
The traditional setup uses a metal flasher paired with a hoochie in matching colors. The flasher creates initial attraction, drawing salmon from 30-50 feet away. As the salmon gets closer, the hoochie's natural appearance and scent trigger the feeding response.
Modern anglers often fish a hoochie alone, especially in clear water or when salmon are actively feeding. This reduces visual disturbance and allows for a more subtle presentation. In low-visibility water or when you need to attract fish from distance, the flasher-hoochie combination is more effective.
The spacing between flasher and hoochie matters. Most successful anglers use 8-12 inches of leader between them. Too short and the hoochie gets lost in the flasher's wake. Too long and you lose the coordination between the two lures.
Salmon Trolling Speed: Finding the Sweet Spot for Your Target Species
Trolling speed directly affects lure action and salmon response. Too slow and your lure doesn't produce the vibration and flash that attract fish. Too fast and your lure becomes erratic, spooking salmon instead of triggering strikes.
For spoons, the ideal trolling speed is 2-3.5 miles per hour. At this speed, a spoon produces a steady wobble that mimics a wounded bait fish. Coho prefer the faster end of this range (3-3.5 mph), while chinook often respond better to slightly slower speeds (2.5-3 mph).
Plugs require speed-specific tuning. A plug designed to run at 2.5 mph will dive and swim correctly only at that speed. Check your plug's specifications before rigging it and adjust your trolling speed to match.
Soft plastics and hoochies work across a wider speed range, typically 1.5-3.5 mph depending on the specific lure design. The advantage is their versatility, you can slow down when salmon are inactive or speed up when they're feeding aggressively.
Water temperature influences optimal speed. In cold water (below 50 degrees Fahrenheit), salmon are sluggish and respond better to slower trolling speeds. In warmer water (55-65 degrees), they're more aggressive and will chase faster-moving lures. By mid-summer when water temperatures exceed 65 degrees, salmon often move to deeper, cooler water.
Common Mistakes to Avoid When Rigging Salmon
Most rigging failures come from overlooking basics. The first mistake is using line that's too heavy. Heavy line is visible to salmon and reduces lure action because the line's thickness dampens vibration transmission. Use the lightest line that gives you confidence in your knots.
The second mistake is tying poor knots. An improved clinch knot tied with only two wraps will slip under load. Use five wraps minimum, cinch it tight, and trim the tag end. Practice your knots on land before you're on the water.
The third mistake is neglecting to check your leader for wear. Every time you hook a rock, log, or fish, your leader takes damage. Run your fingers along it regularly and replace it if you feel any roughness or abrasion.
The fourth mistake is fishing the wrong depth. Salmon congregate at specific depth zones based on water temperature and available bait. Use your sonar to identify where salmon are holding, then adjust your downrigger to match.
The fifth mistake is keeping your rig in the water too long without checking it. Every 15-20 minutes, reel in and inspect your lure for weeds, algae, or damage. A fouled lure won't produce proper action.
Rigging salmon for trolling becomes second nature once you've done it a few times. The fundamentals, quality line, secure knots, proper depth, and lure selection, remain constant across seasons and systems. When you're ready to invest in gear tested in real conditions, Elliott's Tackle & Rigging offers downriggers from Scotty and Cannon, monofilament from Sufix, and modern electronics from Cisco fishing systems. Every product in our inventory has been hand-selected by a captain with forty years of Pacific Northwest fishing experience. Get started with Elliott's Tackle & Rigging and fish with confidence knowing your rig is built to perform.
Frequently Asked Questions
What's the best way to rig salmon for trolling in saltwater?
Start with quality monofilament main line (20-30 lb test for most salmon species), attach a leader using an improved clinch knot, then add your terminal tackle—either a flasher-hoochie combo, spoon, or plug. For downrigger trolling, attach your rig to a release mechanism on the cable. Match your rig weight and lure selection to water depth, temperature, and target species like chinook, coho, or steelhead. Proper knot strength and terminal tackle balance are critical for consistent hook-ups.
How do I set up a downrigger for salmon trolling?
Mount your downrigger (Scotty or Cannon models are reliable choices) on the gunwale or transom. Spool the cable with your weighted ball, then attach your fishing line to the release mechanism using a clip or pin-style release. Lower the ball to your target depth—typically 40-80 feet depending on salmon location and water temperature. Monitor your sounder for fish marks. When a salmon strikes, the line releases from the downrigger, allowing you to fight the fish on your main line with full drag control and sensitivity.
What's the ideal trolling speed for salmon?
Most salmon species prefer trolling speeds between 2.0 and 3.5 knots, though this varies by species and conditions. Chinook often respond better at slower speeds (2.0–2.5 knots), while coho and steelhead may prefer 2.5–3.5 knots. Adjust speed based on water temperature—colder water typically calls for slower presentation. Use your GPS and sounder to dial in the exact speed, and watch for bites to identify the productive range. Experiment within your target window to find what triggers strikes on any given day.
Should I use a flasher and hoochie setup or a spoon when trolling for salmon?
Both setups work, but they excel in different conditions. Flasher-hoochie combos (flasher attracts fish, hoochie mimics bait fish) are highly effective in moderate to deep water and cloudy conditions where visibility is limited. Spoons are versatile, work well in shallower water, and excel when you want to cover water quickly. Plugs offer realistic baitfish profiles. Start with a flasher-hoochie in 60+ feet of water, and switch to spoons or plugs in shallower zones or when you want to target specific depth ranges. Many experienced anglers carry all three and adjust based on what's producing.
0 comments