

Table of Contents
- Marine Electronics Mounting Solutions for Small Boats: Quick Comparison
- 1. RAILBLAZA Fishfinder R-Lock R with MiniPort TracMount
- 2. RAILBLAZA Fishfinder R-Lock S with MiniPort TracMount
- 3. RAILBLAZA Hexx Sonar 360 Mount
- Marine Electronics Installation Tips for Optimal Performance
- Dual Graph Mounting Systems and Multi-Display Setup
- How to Install Marine GPS on Small Boat Consoles
- NavPod and Scanstrut Solutions for Flush Mounting and Pedestal Mounting
- Frequently Asked Questions
Last Updated: September 26, 2026
Marine Electronics Mounting Solutions for Small Boats: Quick Comparison
Small boats present a unique challenge for marine electronics mounting. Space is tight, consoles angle awkwardly, and you're working with limited real estate for displays, GPS units, and transducers. The right marine electronics mounting solution keeps your gear visible, accessible, and secure without compromising console integrity or creating clutter.
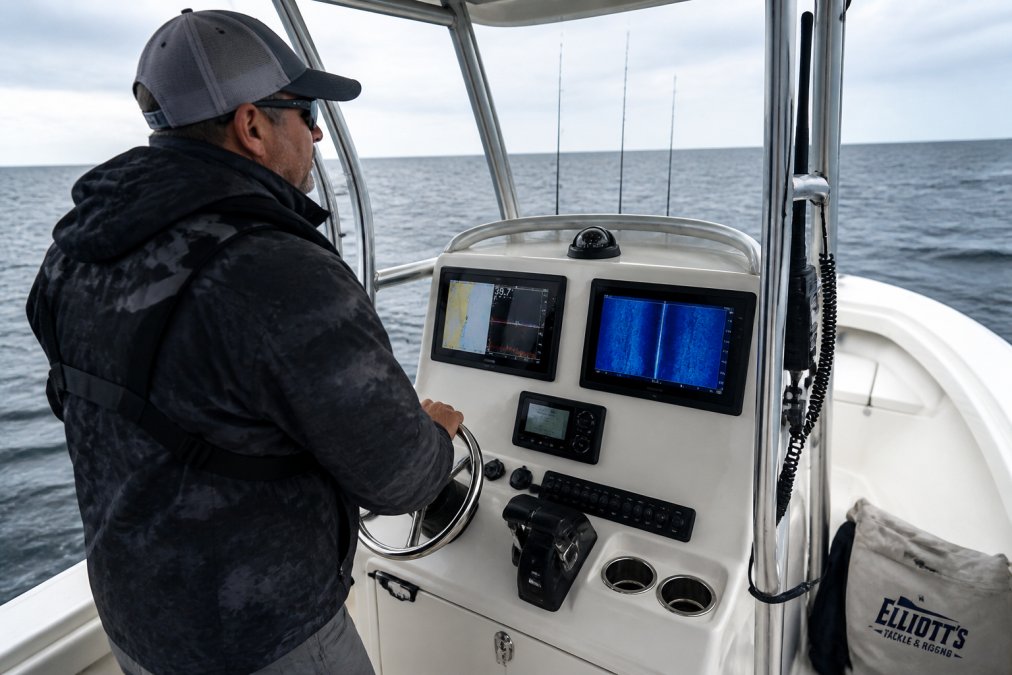
Elliott's Tackle & Rigging provides high-quality marine electronics specifically curated for serious Pacific NW anglers, Great Lakes, Eastern Seaboard and Gulf of America fisherman. Every product is hand-selected by an experienced captain with forty years of fishing expertise, ensuring that only reliable, field-tested equipment makes it onto your boat.
Quick Picks:
- Best for Kayaks & Small Boats: RAILBLAZA Fishfinder R-Lock R, tool-free adjustability with rock-solid holding power
- Best Transducer Mount: RAILBLAZA Hexx Sonar 360, 90-degree pivot for fast deployment
- Best for Larger Displays: NavPod PowerPod Pre-Cut, flush-mounted protection with swivel viewing angle
- Best Budget Rail Mount: Scanstrut ROKK Midi Fixed Rail Mount, corrosion-resistant aluminum for under $60
| Mount Type | Best For | Key Feature | Price Range |
|---|---|---|---|
| RAILBLAZA R-Lock R | Kayaks, light displays | 15° increments, tool-free | $47.99 |
| RAILBLAZA R-Lock S | Kayaks, compact setups | 3.3 lb capacity, removable | $47.99 |
| RAILBLAZA Hexx Sonar 360 | Transducers | 90° pivot deployment | $179.99 |
| NavPod PowerPod | Large displays (12") | 20° viewing angle, flush mount | $539.99 |
| NavPod SailPod | Chartplotters | Weatherproof double gasket | $449.99-$499.99 |
| Scanstrut ROKK Midi | Rails & pedestals | Marine-grade aluminum | $59.99 |
| Scanstrut ROKK Mini Kit | Phones & small GPS | Modular, quick-release | $156.99 |
1. RAILBLAZA Fishfinder R-Lock R with MiniPort TracMount
The RAILBLAZA Fishfinder R-Lock R with MiniPort TracMount uses friction joints and R-Lock technology to keep your sonar display secure in rough water. Adjust the viewing angle in 15-degree increments without tools. The removable U-shaped bracket lets you drop your fishfinder in when fishing and slip it out when you need console space back. Supports displays up to 4 pounds (Fish Finder Mount R-Lock R with Miniport Tracmount).

Pros: Tool-free repositioning, compatible with most kayak tracks, supports displays up to 4 lbs, 15-degree angle increments for uneven surfaces
Cons: Limited to lighter displays; heavier chartplotters need a different solution
Best for: Kayak anglers and small-boat owners who want adjustability without tools or permanent installation.
2. RAILBLAZA Fishfinder R-Lock S with MiniPort TracMount
The RAILBLAZA Fishfinder R-Lock S with MiniPort TracMount is the compact sibling of the R-Lock R, handling displays up to 3.3 pounds with the same friction-joint technology and 15-degree angle increments. The smaller footprint makes it ideal for cramped console setups while maintaining tool-free adjustability and security.

Pros: Smaller footprint than R-Lock R, tool-free adjustments, 15-degree angle increments, removable bracket design
Cons: Lower weight capacity (3.3 lbs vs. 4 lbs); won't support larger 7-inch displays
Best for: Anglers with limited console space who run lighter sonar displays and need tool-free adjustability.
RAILBLAZA Fishfinder R-Lock R →
3. RAILBLAZA Hexx Sonar 360 Mount
The RAILBLAZA Hexx Sonar 360 Mount features a 90-degree pivot arm for fast transducer deployment and stowage. Built from marine-grade aluminum and glass-reinforced plastic, it resists salt spray and UV exposure. Compatible with Humminbird MEGA 360 and other static transducers, the included HEXX Base accommodates track mounting, deck bolting, and other configurations.

Pros: 90-degree pivot for fast deployment and stowage, marine-grade construction, multiple mounting configurations, tool-free installation
Cons: Primarily designed for static transducers; not ideal for active sonar systems requiring constant repositioning
Best for: Jon boat and kayak anglers who want fast transducer deployment without permanent console modifications.
Marine Electronics Installation Tips for Optimal Performance
Correct marine electronics mounting combines secure hardware, proper cable management, and thoughtful positioning. Assess your console space and weight capacity first. The mounting surface must support the weight without flexing, flex causes loose connections, water intrusion, and failure. If your console is thin composite or fiberglass, add a backing plate to distribute the load.
Cable routing matters as much as the mount itself. Run wires down the center of your console or along the underside of the helm, not across open areas where they'll snag on fishing lines. Use cable ties and conduit to keep everything organized and seal cable entry points with marine-grade silicone to prevent water intrusion.
Vibration dampening extends component life. The friction joints on RAILBLAZA mounts and double gasket seals on NavPod systems absorb vibration rather than transmitting it directly to your electronics.
Position your display at a 15- to 20-degree tilt to minimize glare and avoid neck strain. Adjustable mounts like the RAILBLAZA R-Lock systems let you dial in the perfect angle without permanent modifications.
Dual Graph Mounting Systems and Multi-Display Setup
Running dual fish finders or stacking displays requires careful planning. Don't assume your console can support the combined weight, a 7-inch display (2 lbs) plus a 9-inch chartplotter (2+ lbs) totals 4+ pounds. Verify your console can handle this before committing. Use backing plates behind each mounting point on composite or thin fiberglass consoles.
Vertical stacking uses less horizontal console space than side-by-side mounting. Mount your primary sonar display at eye level, then stack your secondary display above or below it to minimize scanning motion.
Run all wires through the center of the console or along one edge, never across the helm. Use separate power runs for each display if possible so one display stays operational if the other loses power.
Consider the viewing angle for each display independently. Tilt your sonar display slightly downward for easy glancing; tilt your chartplotter more upright for menu navigation. Adjustable mounts like NavPod systems provide this flexibility.
RAILBLAZA Fishfinder R-Lock R →
How to Install Marine GPS on Small Boat Consoles
Installing a marine GPS or chartplotter requires secure mounting that protects your electronics from water intrusion and vibration while keeping the display accessible.
Step 1: Choose Your Mounting Location Select a spot that offers good visibility without blocking steering or instruments. Position slightly above eye level to glance down without moving your head. Avoid direct sunlight to prevent screen glare.
Step 2: Verify Console Strength Press firmly on your proposed location. If the console flexes, you need a backing plate. Thin fiberglass or composite consoles require reinforcement to prevent cracking.
Step 3: Mark and Drill Mounting Holes Use the mounting bracket as a template. Mark your holes with a pencil or marker, then drill pilot holes slightly smaller than your mounting bolts. Pilot holes prevent the drill bit from slipping and cracking the console. Start with a small bit and work up to your final size.
Step 4: Install Backing Plate (If Needed) If your console is composite or thin fiberglass, slip a backing plate behind the mounting holes before tightening bolts. This distributes load and prevents the console from cracking around the holes. Use stainless steel bolts and washers to prevent corrosion.
Step 5: Mount the Bracket Slide your GPS unit into the mounting bracket and secure it according to the bracket's design.
NavPod and Scanstrut Solutions for Flush Mounting and Pedestal Mounting
For anglers running smartphones or handheld GPS units, the Scanstrut ROKK Mini Mount Kit with Rail Mount and Suction Cup Mount options provide modular flexibility. Install in minutes, adjust as needed, and move your phone or GPS between different boats. Both kits include the universal phone clamp and adjustable arm, engineered to withstand high shock loading.
Frequently Asked Questions
How do I choose the right marine electronics mount for my small boat?
Start by measuring your console space and identifying your fish finder or GPS display size. Check weight capacity against your equipment, most quality mounts support 3-4 lbs. Consider your boat type: kayaks and jon boats benefit from track-mounted systems like the RAILBLAZA R-Lock series, while center consoles work better with pedestal or rail mounts. Verify compatibility with your sonar display brand (Lowrance, Garmin, Humminbird, Raymarine) before purchasing. Corrosion resistance matters in saltwater, so choose marine-grade aluminum or stainless steel hardware.
What is the difference between ball-and-socket and fixed mounting systems?
Ball-and-socket mounts (like RAILBLAZA's R-Lock systems) offer adjustable viewing angles in 15-degree increments, letting you level your display on uneven surfaces and find the best sightline. Fixed mounts provide permanent, rigid positioning with no adjustment. Ball-and-socket systems are ideal for kayaks and small boats where console angles vary; fixed mounts work for dedicated console spaces where you won't need to reposition your fish finder.
Can I mount two fish finders on a small boat console?
Yes, but console space and weight capacity are critical. Dual graph mounting systems stack displays vertically or side-by-side using reinforced backing plates and stainless steel hardware. Each mount must support its display's weight independently. NavPod PowerPod and SailPod models are designed for this configuration, offering a 20-degree viewing angle and waterproof sealing. Ensure your console backing plate can handle the combined load; reinforce it if necessary with marine-grade plywood underneath.
What materials prevent corrosion in saltwater fishing environments?
Marine-grade aluminum, 316 stainless steel, and UV-stabilized fiberglass-reinforced plastic resist salt spray and oxidation. NavPod Gen3 mounts use acrylic-capped ABS material with thicker silicone gaskets for waterproofing. RAILBLAZA systems use UV-stabilized fiberglass reinforced plastic. Avoid mild steel or aluminum without marine-grade coating. Double gasket systems (like those in NavPod products) and nickel chrome-plated hardware add extra corrosion protection for long-term reliability on the water.
0 comments